Exchange Sets assembly instruction
Version 01/2026 – for flinkey Box IXL only
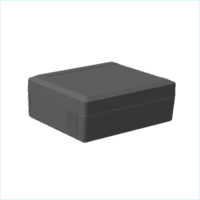
PREPARATION
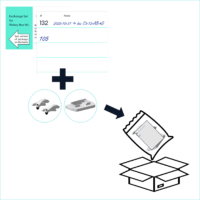
Make sure that to have the following items in front of you.

Below you will find all the individual steps to convert a flinkey Box IXL to another key fob type using an exchange set. Alternatively, here you can get the
Make sure that to have the following items in front of you.
Exchange sets can only be assembled to boxes marked with ‘IXL’ or certain article numbers (AN).
Ready are AN ‘01501114xxxxxx’ or ‘01501115xxxxxx’.
Boxes of older product generations or for key fobs with side button keys are not exchangeable.
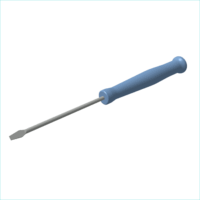
A flathead / slotted screwdriver is required.
The tip of the screwdriver must not be too big.
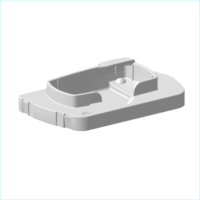
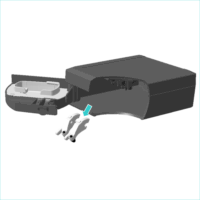
Open the packaging and get out the key bed.
One keybed is part of each exchange set.
The 3-digits variant code is embossed on the key bed.
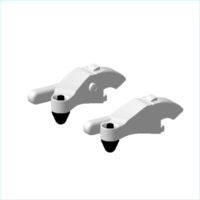
Two levers are part of the exchange set.
One is marked with an ‘L’ for left, one states an ‘R’ for right.
The 3-digits variant code is embossed on each lever.
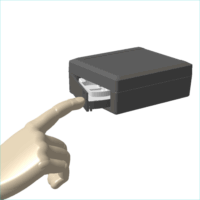
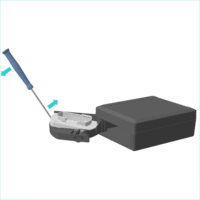
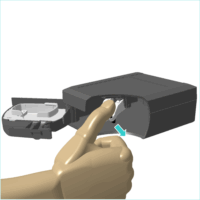
In case it does not open on push, the flinkey box might be locked and you need to unlock it via the app first.
You will feel that the drawer is now “offering” to swing further open.
No force required – it’s moving easily.
At the widest opening angle you are able to look inside and see i. e. the levers.
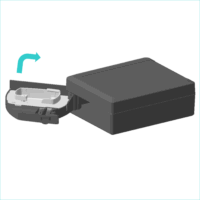
You can see two spaces that are built to slip in with your flathead screwdriver.
In case, it does not ‘enter’ easily, please switch for another one with a smaller head .
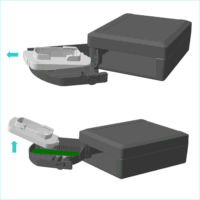
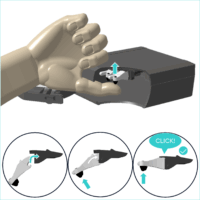
Start in one of the ‘entry spaces’ and move slightly.
Go to the opposite space and move up more.
If applicable, repeat these steps until the key bed is fully ‘released’.
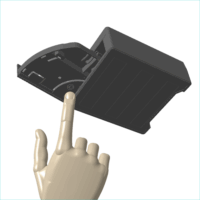
Pull to the back first.
Afterwards move up and out.
Make sure not to damage the electronics located underneath the key bed.
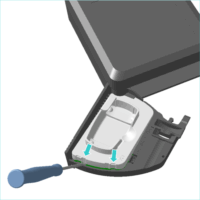
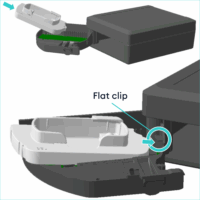
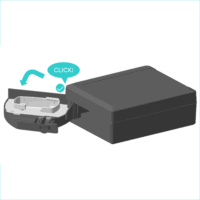
Pay attention to the direction indicated on the key bed.
Slide the key bed in carefully.
Pay attention to the electronics and flat cable located near the drawer hinge.
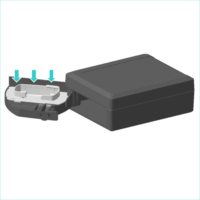
Make sure to click the key bed firmly into the clips.
Do not hesitate, the levers are tightly assembled!
You will need a certain amount of force to release them.
Ideally, hold the box with the drawer pointing to the ground.
Be careful that the levers do not fall into the internal mechanism of the box.
In this event, gently shake out the levers – they are not meant to remain in the box!
Start with the lever marked with an ‘L’ and clip it into the left black counterpart.
Continue with the lever marked with an ‘R’ and clip it into the right black counterpart.
Note, design-wise they cannot be assembled in the wrong spot.
Do not hesitate – it requires a certain amount of force to push the levers upwards!
You will feel and hear it snapping into the clip as soon as a lever is in the right position.
Make sure to have both levers clipped in properly all the way.
No strong force required – just gently push back into the original position.
Once you hear the click, the drawer is back to the default operation position.
Though the variant is embossed on the old parts, the specification is hard to identify in the polybag.
Feel free to use the card for documenting when and where the delivered exchange set was assembled.
And, to state what exchange set variant is currently in the polybag.
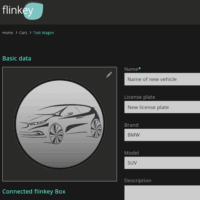
Go to your fleet management system and specify the future car the flinkey box will be used with.
In case you use the flinkey portal, open the car’s section in there.
After you logged in select the car the flinkey box was previously used for. Adjust the car details and save.
We advise to revisit the quick start guide and look into the instrucktions regarding the Key Fob Power Control (= KPC) Adapter. In case you require an instruction on how to replace the battery of your specific key fob, get in touch with us.
After you assembled the exchange kit the flinkey box will only lock & unlock vehicles that use the key fob the new exchange kit was designed for. Hence, you should change the vehicle details for the particular box. In your fleet management system or the flinkey portal.
Depending on your use case, it might make sense to order a selection of exchange kits to open up for more flexibility. We are adding new exchange sets ongoingly – you may get in touch with us or check the overview for the ones you require.